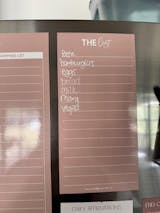
Did you know that liquid chalk needs to be activated before use?
Follow these steps to get started.
- Brand new markers don't have any colour in the nib and need to be activated by priming the nib.
- Remove the cap and with the nib facing upwards, press the nib with your thumb to release any trapped air.
- Replace the cap firmly and shake the marker vigorously until you can hear a ball bearing moving in the barrel.
- Using the reverse side of this card, press the nib in and out repeatedly until the colour saturates the nib. Please persist as this may take a while but it will work.
- If after activation the marker is watery, this means that the product is not mixing properly. Repeat the steps above ensuring the ball bearing is moving.
Care tips
- Store upright - cap end facing upwards.
- Did you know that the nib is reversible. One end is a bullet tip and the other is a chisel tip.
- Liquid chalk erases best when it's completely dry.
- Stubborn stains can be removed with whiteboard cleaner or isopropyl.
- Avoid spraying liquid directly onto liquid chalk. It's a water based product and will dissolve very quickly. Instead, spray onto a cloth and then wipe clean.
- Use a lint free damp cloth or magic eraser to remove chalk.
- Do not store in direct sunlight.
- If you're not sure how the ink will react with your board, do a spot test by picking a small corner, Place a small dot of ink, allow it to dry and then erase.
Troubleshooting
How do I know which colour marker to use on my planner?
You can't go wrong with black or white markers. they are classic, bold and clear and easy to read.
If you prefer colour, please review our colour compatibility guide on this page.
Please be mindful that some coloured markers may not result in a bold result if used on coloured backgrounds. the colours blend together and can be difficult to see unless there is a strong contrast.
My chalk is watery, how do I fix it
There's a small ball bearing in the barrel of your marker, you should be able to hear it moving when you shake your marker. If you can't hear it, the ball needs to be to dislodged - tap the marker firmly on a solid surface a few times e.g. the kitchen bench, then shake the marker vigorously.
The ball bearing moving in the barrel is essential for mixing the chalk and water solution. As always, make sure to shake your marker before each use.
Light pink marker is not working
Full transparency, this one's been a bit of a problem child.
Please follow the steps to make sure you can hear the barrel moving, this is essential.
If the writing is water, use a tissue or some tweezers and remove the nib. Turn it around and put it back in. The press the nib in and out a few times and it should work perfectly.
If not, please contact us for assistance.
My chalk isn't bright like the pictures
Please follow the steps above to make sure the ink is well mixed. Shake vigorously prior to each use and in between use, store the marker with the cap up. This stops the chalk from continually saturating the nib. For the first 1 or 2 uses, write with your planner on a bench instead of the fridge - this will help gravity to load the nib for writing.
What surfaces are compatible with chalkboard markers?
Smooth non-porous surfaces work best. Such as: laminated magnet material, glass, metal, plastic, granite, glazed ceramic, porcelain chalkboards, chalkboard contact paper paper, vinyl labels
Can I use them on chalkboard paint?
Generally, chalk markers don’t work well on chalkboard paint. Paint tends to absorb the ink from the markers and it doesn’t erase easily. Though some brands of chalkboard paint may work, we recommend you only write on unpainted, non-porous surfaces.
There are marks left after I tried to erase them – what do I do?
We have introduced the OLB Whiteboard Cleaning Kit which will dissolve the chalk leaving your planner fresh and ready to use.
- You can also try a Magic Eraser (use a very light hand) and a bit of water and the ink will come off most surfaces.
- You can also try using Isopropyl (min 80%).
- A cleaning wipe for glasses may also do the trick
How to turn the nib around
The great thing about our marker is they have both a bullet and chisel nib in one.
They will arrive with the bullet nib in place but if you would like to try the chisel nib, grab some tweezers (so you don't stain you fingers) and pull the nib out. Turn it around and pop it back in - then twist to the right a couple of time and it's ready to go.
How to fix clogged nibs
Sometimes the nibs can get clogged. Here's some tips to fix it:
- Option 1 - use some tweezers to pull the nib out. The turn it around and pop it back in. Then reprise the nib. You will have a different nib shape but this is usually the trick to getting the marker to work.
- Option 2 - remove the nib and soak it in some warm water for about 2 minutes. Then replace it. Here’s a link to a TikTok that shows what to do: How to unclog liquid chalk nibs


